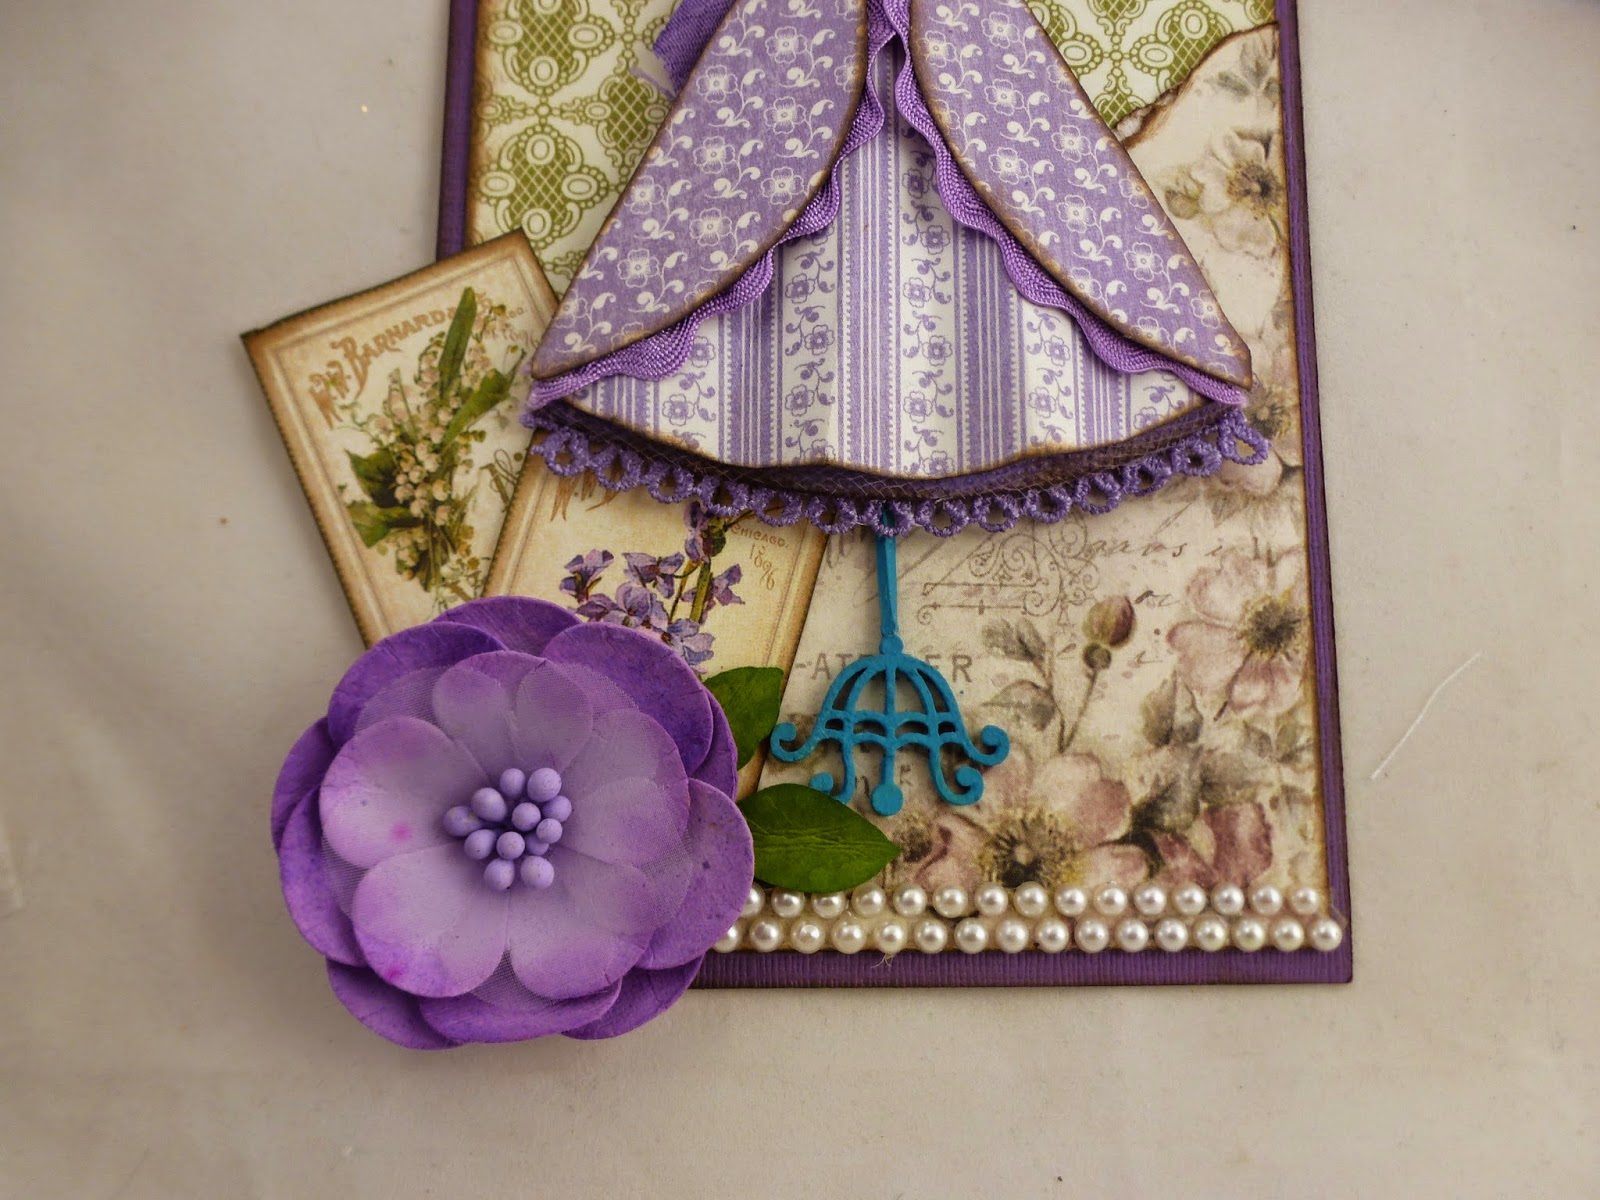
I participated in a color challenge tag swap for the month of August. We needed to use a dark purple/plum color, light purple, blue, dark green and a light green. When they say challenge, challenge for me it was. These are all colors I don't work with very much, but decided to delve in head first.
I could have taken the easy way out and purchased the new Bo Bunny collection as all the colors would have fit and made it much easier. However, I wanted to see if I could make what I had in my stash work. It took me a couple of hours of going through all my papers to find about a dozen I thought might work. This is nothing new. I do this every time I create. I wish I could just close my eyes and just grab paper and make it work. Sadly, I am too (insert nicer term here) particular.
When I called the tag deceptively simple, it really appears to be more simple than it actually was to create. :) That started for the front with textured plum cardstock. Then I matted it with a green patterned paper from graphic 45. (All the pieces were sized and cut using the Silhouette Cameo). Then I used to more cuts of the tag shape using a purple flower and striped pattern paper from Pion Designs. I decided to tear the top and bottom sections of each (leaving more on the purple striped pattern to show through) All the edges were inked with knotted wood Prima chalk edger, then the layers were glued down.
I painted the dress form with a blue chalk paint. I cut the dress form at the bottom of the dress portion to elongate it. Next I created the dress. I cut from the plum card stock a piece to fit as the bodice and embossed it, added rick rack and pearl trim. With the skirt, there is a layer of lace, two layers of pleated tulle in dark plum and light purple, a pleated pattern paper (G45), a layer of rick rack, and then the top patterned paper (G45). The lace trim, the rick rack, and lace were all white and I tinted them all shades of the purples so that they would blend in. To finish off the outfit, I added a piece of trim and a blue rose to the waistline.
The bottom portion, I cut out a few images from G45 and inked, created a couple of leaves by cutting out using a TH die, scoring with a bone folder to create veins, and then inking and spritzing with water to get a more natural look. I finished off with a flower from BoBunny and some pearl trim from Recollections.
The top I used some of the trim to create a triple bow. I used a TH bauble to hang from it. I added a purple rose to the Mellissa Frances hanger to tie it in to the tag.
For the back of the tag (funky angle sorry), I added another layer of the plum card stock for both strength and that the texture side would show on the back as well. Gives it a more finished look. I added the same green G45 patterned paper to the back and then finished off with an image cut from the paper line as well. All edges were inked before gluing down.
Thursday, August 21, 2014
Wednesday, August 20, 2014
A bit of a challenge to myself
I am not sure what your creative process is, but I know that mine is usually long, slow, and deliberate. I was Skype crafting with a friend over the weekend, and she was getting quite the kick out of me. It took me over 2 hours to select then narrow down just my paper selection down to 12 sheets of paper for a tag. In that two hours I think she must have gotten two or three things done in that time. I envy someone who can just go in and whip something up without agonizing over every choice.
So today I was getting ready to pack up a goodie box for an Australian friend. Unfortunately with shipping costs, I am a little more conscious this time around in how I pack her box. One thing to save space was to take items out of the original packaging. It saves both room and weight. My options were to let the items roam free in the box, put in a zip lock, or come up with another plan. I didn't like the first two options and found these great little envies in my stash. I decided to decorate them up to make them more of a gift. Now here comes the draw, I probably could have spent days making these between planning them out, deliberating all the details, and execution. However, I decided to give myself a little challenge. I gave myself 2 hours to complete all the envies. I figured that they were just for packaging, so I would make them fun but keeping in mind that they may just end up in the trash. I used materials that were handy and just went for it.
Here is what I came up with....
Thursday, August 14, 2014
WOOT WOOT AND HAPPY NEWS
Today is a great day. I am doing a major happy dance today. Creative Embellishments announced their new design team on their blog today. Woot Woot. I made it. Woot Woot. So thrilled. If you are not familiar with their store, it is definitely a must see. They make fabulously detailed chipboard and wooden die cuts, flair, and stamps. So excited....please check out the blog post here. The link to their store is here.
Friday, August 8, 2014
Organization - Stamps
I am trying to get the beast other wise known as my craft room organized. Given the fact I am a super messy crafter, it isn't to bad. I know for me, I like my supplies to be easily accessible. I have a super great find that I am using to put the majority of my embellishments. I will show that piece when I am complete - so excited about that one. For a long time, I have been using a clip it up to hold some of my embellishments. I would need about 10 of them to hold everything - (Isn't that the same for most of us :) ) I wasn't sure what to do with it when I took everything off and just set it in the corner.
I have done several major purges over time, especially with stamps. I still do have a nice collection of them though. Never really figured how to store them so that they would be easily accessible, something I could put away easily (I am so not good at that), and cheap. I love the ideas of the TH binders, but I would be into it for about 200 by the time I got everything I needed. Thought about binders and inserts, that would work but I would still need about 5 big binders plus the inserts. Definite possibility, but then it hit me. I could put them on the clip it up. Bingo, it works perfectly.
The only thing I realized that the regular sandwich bags (with out the zipping feature) are very flimsy. So I will need to go to the dollar store and get box to replace the ones that are housing the smaller sets. So for a dollar and using what I had available, I have a new stamp storage system.
I love the fact that I can spin it, see what I need. I can easily just hang it right back up when I am done. It holds over a 100 stamp sets. So excited.
Thursday, August 7, 2014
Altered Cigar Box
I love Timmy products. For fun, I decided to make a box with all kinds of Timmy products and a few other bits. I used his stains, paints, inks, wallflower paper, ephemera, dies, rub-ons and ideology. For the lace I used Lindy Stamp Gang's Tiffany Lou Blue to dye it. I decided he needs to come out with white and brown rub-ons in the same designs too. I would so get those :)
Tuesday, August 5, 2014
June Tag on CreateExchange
The directive for June on Create Exchange was to create a vintage tag with textures. I wanted to do a little twist and create it into an easel box. The little box was handy for stashing in some extra goodies for my partner. The photo is a fabric transfer using an image from the Graphic 45 Romantique collection. The rest of the paper used was from the Prima Time Traveler's Memories stack.
Monday, August 4, 2014
Baby Diaper Castle
We had a new addition to our family. My nephew and his wife welcomed a baby girl into their lives last month. My sister threw them a baby shower when they came out to visit. I was tasked with making the centerpiece. I knew that I wanted to do a spin on the traditional diaper cake. When I came across this pattern on SVG cuts, I knew that is what I wanted to make. (Josh took the pictures for me on this one. He likes to help out once in a while.) It is all a learning process.
Subscribe to:
Posts (Atom)