Monday, March 10, 2014

Altered Art Journal

So here is the First A project - Altered Art Journal. 

I have been wanting to do an art journal for a while.  I will say I have been a little bit intimidated.  I see all of these amazing pages on Pinterest, You Tube, Facebook, etc.  The thing is how do you get better at something....you jump in with both feet and just do.  As we do, we grow in our abilities and just get better with practice.  I have picked up a couple of journals over time and decided that I wanted to focus on the smaller one.  the pages are 5 1/2 x 8 1/2.  I had seen some videos on youtube where France Papillion does it on an 8 1/2 x 11, cuts in half and then puts it into the book.  I figured this would work perfect for me.


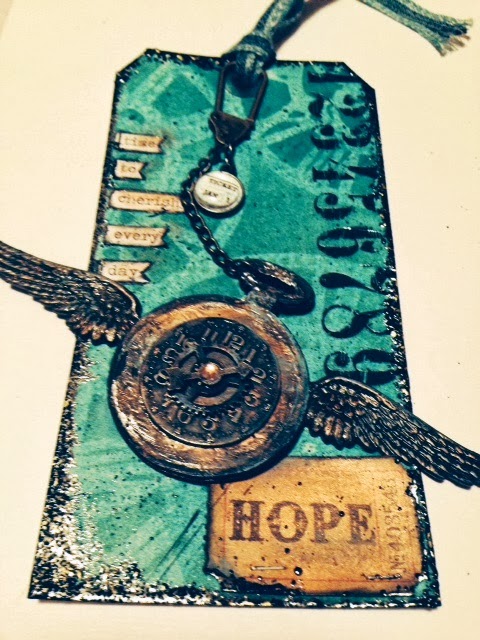
Started with a wire bound art journal.  I loosend the rings and slipped off of the covers.  I love that the journal had a texture already to it similar to canvas - bonus.  Painted with gesso and let dry.  Using a lattice and script stencils, I covered most of the surface with embossing paste. I layered on pieces of punchinella and snippets of dry wall tape randomly on the pages.  I cut tons of clock and gear cuts using the silhouette and 65 lb cardstock.  Then painted over the surface with another coat of gesso.


I then sprayed the heck out of the covers with Lindy's sprays.  Of course Tibetan Poppy Teal and Cattail Copper Brown were the main ones.  Then I followed up with gilder's paste, dry brushed with burnt sienna acrylic paint,  then smudged a black ink pad over sections.  


 Finishing touches: Added chunky aged embossing powder around the edges of the book.  Cut a welded title from silhouette 3 times and layered.  Embossed with a square patterned embossing folder.  Embossed in black utee.  Used rust gilder's paste to add color.  I did the same thing with the clock hands.  Layered those with clock gears.  Then I splattered the covers with a bit of black paint. I added dcwv steampunk papers to the inside covers to finish off. 


Sunday, March 9, 2014

I am back - woot woot; Technique Tutorial and a Product Review

Sorry for falling of the face of the earth...well maybe not off the face of the earth - just a two inch step.  I fell 6 weeks ago and ended up fracturing my wrist and leg right below the knee.  So I was pretty much out of commission as far as doing any crafting.  I attempted to do a few things and start a few projects that I could do mostly with my left hand.  Needless to say I didn't get much done.  Finally I have my hand back so I am going to get back to crafting.

I have to say I feel a little lost without having swaps.  Usually I had a direction I needed to go and a deadline.  Yep, I get most of my mojo when I know I am under the wire or have a commitment in place.  Needless to say I have a ton of half done projects, backgrounds sprayed, and ideas floating around but not too much in the completion category.  I think for me, I need to set some goals and my own timelines so that I can be a bit more productive in the time I have to craft. 

One idea I have been bouncing around for a bit, has been crafting my way through the alphabet. I would pick a project, technique, item to use in the project, etc. that began with that letter. I would complete at least one project for each letter.  If the mood strikes, I could always go out of alphabetical order.  I will be utilizing different products and techniques.  In doing so, I am going to be showing some projects, tutorials, techniques, product reviews.  (I have not been provided any products - so this is just all my take on different ones that I can easily find).

I am going to try to post more regularly.  If you think of an interesting project or technique you want me to try for a certain letter, just let me know.

So for an A project I am working on I am doing a copper patina technique.  There are so many ways to achieve a patina look.  Today, I am just focusing on two techniques with paint. 

Technique and Review # 1: 
Modern Masters Metal Effects Copper Paint and Patina Aging Solution
Cost per ounce:  Paint: 11.99 for 8 oz/ $1.50 oz  Patina  $8.25 for 4oz/$2.06 per ounce
Characteristics:  The paint is water based and has actual copper in it.  Since it has actual copper within the paint, it will patina naturally over time.  You can speed up the process by adding the aging solution to the paint.
Ease of Use:  Simple
Directions:  Paint first coat (may need to primer first depending on surface).  Let dry for 1/2 hour. Place on second coat.  While wet, add Patina aging solution.

NOTE:  Trial and error is how we learn.  I am so used to using the rusting solution where you apply all over...my first attempt with this product I applied the aging solution all over.  It wasn't bad, but there was no copper showing any more - it was pure patina blue.    So I would just put the solution on with a brush or sponge onto the areas that you want to speed up the aging process. 

I am in love with the results.....love love love.  The only drawback is that I usually have to order online.   Well worth the money if you are doing a special project.


(The above picture is from a project I am working on and I had put a layer of modeling paste and then tapped my finger all over to create that extra texture).

Technique and Review #2:
Acrylic Paint: Metallic Copper and Patina (You can use any brand - I just used what I had which was the Martha Stewart Metallic Copper and the FolkArt Patina)
Cost per ounce:  You can get the paints anywhere from .50  -  under 2.00 for a 2 oz bottle at Michael's or any craft store.  The price will vary on brand but the cost per ounce will be somewhere under a $1.00 give or take.
Characteristics: Acrylic, dries fast. 
Ease of Use: Simple
Directions:  Paint one color and let dry.  It doesn't matter which color you put down first.  I did it both ways to show a comparison.  Once dry add the second color - let set for just a minute or so.  I wad up a small piece of paper towel.  I like the cheap textured ones as a personal preference and then just dab up some of the extra paint.  The crinkles in the paper towel and the texture in it will give your paint a more unique appearance. 

I do love the results and the paints are easy to find. Due to the size of the bottles, it is an economical choice.

The ME Copper Paint is on the far left, Patina Acrylic Middle, and Copper Acrylic far right


This picture you can see where I painted copper paint over the middle (and had already lifted some up with the paper towel) and then on the right, I painted over the copper with the patina.


The paint color is actually closer to the two above, the larger picture below the two shows better what the texture and overall effect looks like.  Somehow at that angle with the lighting, the colors appear brighter when they are actually more subdued.


There are many ways and products to achieve on different surfaces and I will go through some of those on another tutorial.  However for a quick background on paper - my definite go to is Lindy's Sprays Cattail Copper Brown and Tibetan Poppy Teal.  Just spray and let them run together.   Here is just a sample.


 This was a die cut that I had rusted a while back when I did a batch.  I just threw on one coat of the copper plus patina (not an even coat as I wanted a varied look).  This is what the outcome was - I really like it.


Sunday, January 12, 2014

Tim Holtz January Tag

For the last two years I have been saying I wanted to do Tim Holtz's  12  monthly tags, but never get around to them.  This month, I started off and did his January tag as he displayed the steps and then I did a second one with my own take.  Although I took a simple approach, I do like how it came out and I actually did it. Bonus. 


CANVAS #6 CUTESY

Hello all.  It has been a little while since I posted a canvas.  I am attempting to do small canvases in different styles as part of a private swap I am doing with a friend.  To say I was dreading this style...it would be an understatement.  I had such a difficult time.  First of all, I had done the destash back in September and got rid of everything that could have been remotely used for cutesy or so I thought anyway.  Second, I was drawing a blank.  THANK GOODNESS for GOOD FRIENDS. My friend, Kim, pulled through and sent me this awesome ATC to build this canvas around.

You would think that having the focal point would make doing this canvas so much easier. Not for me.  I ended up doing the canvas 4 times before I got it to the way I could live with it.  Pastels for me are hard to work with, so once I darkened up my palette, it was much easier for me to get past the creative block.  I decided to go with a simple approach as well. 


CANVAS
I went with a simple bright tomato red color    I layered on several G45 papers from the French Country 6 x6 pad. 
 
LAYERS
Using a paper pattern that I free hand cut a paper heart from, I used it to cut the shape out of a pair of old jeans.  Using embroidery floss, I did a sloppy stitch around the border to give it more of a home-spun flair.  I added a piece of adhesive backed Recollections red lace to the middle of the heart. 
 
ATC
Kim sent me this wonderful ATC.  She certainly knows how to make things come to life.  I love all her intricate details including shading and highlighting.  The only changes I made were: I swapped out the orange button for a quilted red heart button I had in my stash and I inked over the top of her inked edges with red. 
 
EMBELLISHMENTS
I decided not to overdo it on the embellishments and went simple.  I used a jewelry finding and strung on the letters BFF with the hearts.  I cannot believe how long I have had those in my stash.  To cover the edges of the finding, I used these little gingham bows that I had received with an order I made last year. 
 
Overall I think the canvas came out pretty well.  Now to choose the next style to work on.


Friday, December 27, 2013

Organization project #1 - Ribbon and trims

My craft room is in dire need of some serious organization.  I did some straightening, but that is seriously not enough.  I did a destash, but I could stand to do another one.  However, as fellow crafters can probably empathize, it is hard to part with beloved craft supplies.  So I am not going to do it all at once, and not drag everything out to do it....for me that only results in disaster.  I room full of stuff and me being overwhelmed.  I decided to take on one project at a time and as it gets done, (putting no deadlines or pressure on myself), I will move onto the next. 

Project #1:  Ribbon and Trims....

How in the heck did I end up with so much ribbon and trim?  I destashed about half of it back in September, but there is just still so much there.   So here is the before picture.  I had two drawers chucked full.  I was originally going to do ribbon books.  You can see my original below.  I had done this one well over a year ago (if not longer), but never got around to doing more of them.  Two problems with this solution...took me a while to hand cut all the notches in the pages.  The whole thing was from scratch.  Second, I don't have a lot of surface space for storage, but I do have drawers.
I was able to get it down to one.  I move it to the Alex unit behind me for easier access as well.

BEFORE
 
AFTER


The original book:  Front cover view
 Spine
 Inside view.

I had recently purchased a silhouette.  Well, I got it back in September with the proceeds of the destash, but recently took it out to play with it.  Shall I say I am in love? Boy am I ever.   Using file # 45600  from the silhouette store.  I created a storage solution that I love. 

The file comes with the cuts for box, 8 inserts, and side panels.  I just used patterned paper and since it was in a drawer, I didn't worry about fussing with that step.  I did however cut double the panels as I wanted to double up the inserts to make sure they were more durable - so I just glued two back to back.  In all, I cut twenty four boxes (only used 20) and 8 x 384 inserts.  The box measures 5 1/4" long x 2 13/16" wide x 2 6/16" deep then card at its tallest point is 2 13/16".

The drawer held twenty boxes and 5 - 10 cards fit in each depending the amount of ribbon/trim and thickness. I had just enough room along the side to tuck in 12 more cards without the boxes.


The box cut. It was easy to assemble because the fold lines were perforated.
 Assembled using score tape and inked edges.
 Here is a box filled with the ribbon
 A close up of the ribbon cards.

A quick Christmas Project

I was having the entire family over for Christmas.  Everything looked festive and cheery, but the back wall on one side of a door way was completely blank.  It needed something quick, easy, and festive.  This was a very fast and easy project...a little simpler than I usually like to go but I think it turned out pretty nice. 

Monday, November 25, 2013

Canvas #5 Simple with an elegant French Country Flair

Simple was the next style I wanted to tackle.  I don't think simple is necessarily it's own style but a version of any style.  For example, you could go simple and clean on vintage or heavily embellished as the same with steam punk or any other style.  So I went with French Country and I wanted to do a an simple and elegant version as the papers are so gorgeous that they shine on their own.  This canvas took lest than 20 minutes to complete.  Bonus.

1.  Painted edges of canvas with TH black crackle paint.  Very quick and produced tiny crackles. 
2.  Sprayed ribbon with pearl Tattered Angel's Glimmer Mist.
3.  Cut and inked papers.
4.  Layered on papers - adding ribbon before adding top piece.. 
5.  Added fussy cut flowers and a Jolee's flourish.
6.  Tied ribbon.
7.  Used gold rub & buff to highlight edges of canvas and black edges of paper.