Thursday, August 22, 2013

Projects and Projects and more Projects coming and some changes

Well it seems like the last month and a half is blown by.  Sorry I haven't posted more, but I was waiting until my partners received their items before posting them here.  I have decided to take a break from hosting swaps for a while.  I am going to focus more on playing, trying new techniques, conquering my crafty bucket list, playing, and finding the joy in crafting again.  I would love to join a design team, but if that doesn't work out....lots of playing is in my future. I think I got a little burnt out going non stop for a really long time making things for others and not taking the time to make things for myself as well.  Although I love swapping, I thought it was a perfect time for a break.  With changes in my personal life... it just seems right.  I am really excited about the next chapters in my crafty adventures.

In addition to playing trying new things, a friend I have decided to come up with 5 goals each to accomplish by November (well through the end of it any way). 

My five are:

1.  Prepare projects to try out for design teams (I already did one).
2.  Make Christmas presents (and not all on Christmas Eve and Christmas morning). (LOL)
3.  Organization (I will get back to this one - in the great words of George Lopez - I got this)
4.  Finish Obligations - All my swaps are completed, mailed, and the threads are done....woot woot.
5.  Rescue Items from the unloved bin - well I pared the bin down a little in the organization process and I have rescued two so far and I am working on a project to use them both on.

Okay, what is the unloved bin....it is where I put projects or items that are just not working out and I don't know what to do with.  They sometimes get rescued quickly, but other times it seems like they take up permanent residence until I know what to do with them.   It my challenge to myself to start emptying the bin and finish projects.

So back to the organization.  If you do something, might as well go big.  I decided now that I am not doing swaps, I can pare down my stash.  LOL  I spent all last weekend hauling stuff out the craft room and throwing junk away.  I am going to have a large sale on a private FB group this weekend to get rid of the good items that I just have no need for.  Can you believe that it fills my entire living room the stuff I am going to sell?  My craft room is 10 x 10 and it still looks full, where did all that stuff come from.  It just amazes me.  So I will still have a lot of small organization projects....but this will get me on the right track to get things where I really want them.

Here are some projects I have made.  I need to retrieve pictures from my phone for some others. Ooooh the exciting thing is that I found the charger to the camera that I can take decent pictures with.  It has only been missing a year.  So excited on that one.

The first several projects were for the die cut swap - you had to make items using dies. 

 I had to make a crown using the gear dies.  I found the inspiration for this on Pinterest and knew I had to make one.  It was a blast and super easy.
 I know this isn't the best picture - but it is a patriotic themed banner as my partner's 3 children all serve in the military.  I used the TH ornamental and 3-D star dies.
 This project was a blast to make.  It is using the TH small and large cabinet card dies.  I cut two solid pieces for the back ground on both sides.  Then I cut tons of frames of the die by putting one inside the other.  Then painted the layers black layered fussy cut images coming out of each layer to add dimension.  On the other side I made a frame for a picture.  I made a little stand for it to rest on using a small candlestick holder as the base.  Love the G45 paper.


 This was for Short and Sweet swap.  The objective was to repurpose or give an old item new life.  This had been a TH stamp box that had been abandoned.  It got a make over and a new live for my partner for her Timmy stamps.
 Since the box is metal and the inserts were plastic, I decided I needed to do a different treatment to the box.  Covered the box in black alcohol ink and then sponged on the metallic distress paints.  I love the finish.  I used Andy skinner techniques on the gears and adhered them to the box.  I made a little metal dangle to attach with the luggage tag to the box.  It was really hard to part with when it was done.

 I made this box for my niece's wedding in July.  Wow it took some time.  Inside I had put all her wedding favors that I put together.  I love how the box came together and she will be able to keep as a wedding keepsake for some pictures and other memories.

Wednesday, July 31, 2013

Color Me Happy

I love inks, sprays, and all that yummy color goodness.  For those that know me, I am usually covered in it.  Thankfully I work in an attic, because most of my clothes have been blessed with the gift of color.  For those of you who have participated in my swaps, know I am a huge Lindy's Stamp Gang lover and tout their goodness every chance I get.  Color me happy when I found out they were have an open design team call.  (Check out their link to the call here.) Woot Woot.  Sounds like a match made in heaven to me. 

The project for submission had to be within the guidelines of the July 2013 color challenge.  The goal was to incorporate at least two of the four colors: Red, white, and two shades of blue.  To check out the challenge and see the amazing entries....click here.


I started to panic when I saw the color scheme at first.  I am a grungy girl ....how on earth could I incorporate these colors into my style?  I contemplated choosing a project fitting the color scheme or using just two of the colors....but decided to embrace the challenge head on and use all 4. I have to say I was pleased with the results.

For my project I decided to do an altered paint brush.  My favorite projects tend to be those that I make something new out of something old.  I also wanted to try different techniques with the sprays to see what more I could get out of them.


For the ribbon I dyed seam binding with the over spray of the various inks but using Danny Zuko's Denim as the main color.  There are hints of the other colors in the ribbon.

For the handle, I base coated it in brown.  Once dry, I stamped with a script stamp and embossed with extra fine embossing powder.  Then came the fun part.  I used Jumping Jack Frost, Danny Zuko's Denim, Ocean Breeze Blue, and Caribbean Blue to create a mottled look.  I love how it came out. 

To add a little brightness, I sprayed some Tim Holtz tattered trim with the sprays as well. 

Instead of using the metal cuff on the brush, I discarded it when I took out the bristle block.  I found that in the last brush I did, I loved using grunge board instead.  I coated with gesso then sprayed and blotted until I got the desired look.

A close up of the handle.  I love how some of the brown shows through and the text becomes very subtle, but gives it some interest.
To finish off the brush handle, I added a TH Ideology numeral piece, a Prima light bulb, and a flourish rub-on.  The buttons on the side of the piece are to secure the metal wire that holds the tags inside of the brush.

On the cuff I also stamped with a script stamp and embossed the edges with embossing powder to give it some definition.

I died some lace with the sprays and tucked part of it to the inside of the cuff.  Over the top I added a quote piece from TH that I added white gesso to.  It is secured in place with dyed twine in none other - Lindy's sprays.


Saturated this tag with the sprays.  When It was completely dry I added drops of the Jumping Jack Frost.  I had taken the spray nozzle off and just added the drops.  I wanted more of a blotchy effect.  I heat embossed the edges with chunky embossing powder and then layered onto patterned cardstock for the border.

 .

On this tag I sprayed my craft mat with the colors and then dipped the paper into the ink until I got the look I wanted.  Then I sprayed the red onto my craft sheet and dipped the stamp into it.  It worked beautifully.  Then I stamped in archival ink the butterflies
This tag was a lot of fun to do.  The little banner tag on the front is from the same piece.  I used molding paste and mixed with the Red spray. I didn't quite like the look after I was done and took the template and patted it onto some blue card stock - so loved the look then.  I added some grunge stamping with the red spray and fine lines as well as in black archival ink for the dots.  I added a Th rubon  and then embossed the edges of the tag. 

For the key I painted it with gesso and then sprayed with the stains.  I dyed some seam binding ribbon and attached to the key.

This piece is cut from the one above.  I added a rubon, mini paper clip, and some bling.

 I found a technique on YouTube using metal and alcohol inks.  I wanted to see if it work withLindy's.  It does, it does.  :)    I embossed a piece of metal HVAC tape with an embossing folder.  Then I painted the metal with gesso.  After it was dry, I took the lids off of the inks and painted in the sections of the tag with the sprays.  Once dry, I added some archival ink to grunge it up a little and then sanded so that some of the metal would show through.  I finished it off by embossing the edges.
 I took a piece of grunge board and embossed it with a ruler embossing folder. Then I gave it some brown yummy goodness then embossed the edges and stamped with a script stamp.  I embellished it with a TH Ideology piece and an altered crown.  I had painted it with gesso then sprayed with good old Danny Zuko.

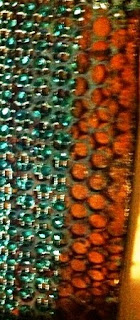
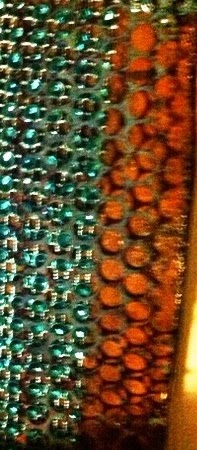
For a little bit of texture.  I added a strip of bling and then some punchinella.  I had painted the punchinella with some texture paste then sprayed with the Danny Zuko.


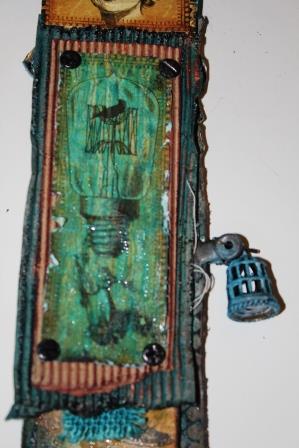
I distressed all of the edges and dipped into the sprays to give it some grunginess.  I coated the tag in rock candy distress crackle.  I added some punchinella, bulldog clip, bird cage, and metal piece that I had altered with gesso and sprays.

This tag I went nuts on and just played.  I love it.  I used texture mediums, crackle mediums, stamps, sprays, you name it.  I sprayed brown ink on the matt and dipped the edges of the tag in it.  I love the funkiness of it. 


For this tag, I kept it simple as I love the pattern.  I did a light spray of the brown sepia spray and added a little of the blue.  I dipped the edges in the brown ink in order to frame it.

This tag is a tad bit funky, but I love it.  I dyed some corrugated card stock with the Danny Zuko.  Then layered over it some natural corrugated stock.  I went over my image with drips of the different colors of blue sprays then covered it with the Rock Candy.  Once Dry I saturated it with more spray.  I added some brads that had been embossed.  Love the distressed look.
 
Go Check Out Lindy's Store and you will be addicted too. :)  Here is a link to the colors I used:


BLOG CANDYWINNER

Blog Candy Winner is post #6....I had josh pick a number between 1 and 21.  Congrats PlanLady...message me your address so I can send you box full of goodies.

Sunday, July 14, 2013

Grungy Goodness: An altered paintbrush (Super pic heavy :) )

I made an altered paintbrush back in April for a paintbrush swap.  I had quite a bit of fun doing it.  For another swap on the CMB, my partner had requested an altered paint brush because she had really liked the one I had made.

Have you ever made something, and then attempt to go back and replicate it and don't quite have the same luck?  I was feeling that way in the beginning.  For my first brush, I had one in my stash that I used.  After that swap, I had picked up a few from the dollar store.  I was able to take of the metal piece easily so that I could pull out the brush block.  The problem came in putting the metal piece back on.  I tried for about an hour one evening and then an hour the next.  I had gotten it on, but the seam was all mangled and I was crushed.  I didn't want to send something looking like that. 

I don't know about you, but sometimes I get so committed to plan a, that I forget there is always a plan b, c, d, e..... and so on.  I had glanced over on my craft desk and saw a piece of grunge board and all kinds of things just went off in my head.  I had found my answer.  I cut the piece down to the size of the piece I took off.  I embossed it and painted it with gesso along with the handle. Rusted both  and then rubbed a little black ink over the embossed areas.  heat embossed a script stamp with ultra fine embossing powder on both pieces.  Heat embossed with chunky powder on the top and bottom of the faux metal piece then adhered the two together.  I am really pleased with the results.


Don't forget about the blog candy give away here for your chance to win.

Thursday, July 4, 2013

Happy 4th

Happy Independence Day!!!! Here is a little  patriotic atc I made.  Not traditional, but not my usual grunge. Even for simple projects don't forget the details.  Inked edges, layered cardstock, and some bling.  For my grunge/steampunk lovers I will be posting a project I love soon.


Wednesday, July 3, 2013

Patriotic Wall Hanging

We live in such a great country.  Time to get a little patriotic.  Using the Tim Holtz rosette die (my most used). 


Sunday, June 30, 2013

A project revisited

I had made a little 6x6 mock canvas a while back.  I love doing these because you use chipboard as a base instead of a canvas.  So I bought a 25 pack of chipboard for $9, you can get a 100 canvases out of one pack.  That comes out to .09 cents a canvas..... woot woot.   It gives a chance to play and practice with techniques and styles without having to spend a fortune.

I went crazy on this one adding all kinds of paints and textures as well as some stamping.  I love the look of the black stamping.  It doesn't have to be "clear" so to speak for the overall design.  I just love the pops of black against the blue.  There is red, whites, and blues in this canvas so I pulled it out to alter further for a red, white, and blue swap.  It doesn't all have to be patriotic themed.  My partner is very interested in mixed media and different techniques.  So I thought she would appreciate this.

I added some color to the metals with viva décor inka gold in copper and then backed it and put another hanger on it. (The hanger is tucked behind the canvas in this picture)  I customize my own hangers by using twine and the viva décor along with some distress ink to give it more of a metallic look.

If you are not familiar with it, the stuff at the bottom of the canvas are mica flakes by Stampendous.  I used tarnished flakes.  I love this brand because the flakes are so large and beautiful.  It really catches the light and adds texture to the project.

Another little love of mine is the metal mesh behind the left wing. I found that at Michael's in the wedding section.  It a soft metallic mesh. It looks like metal on the projects, it is flexible, easy to use and adhere, it light weight and just way easier to work with than regular metal mesh for most things.  Also - huge roll $12.99 then you can use a 40% off coupon on it for further savings.

grab some chip and experiment. 

 
Here is the one with a picture of my hanger. The image I used was from the G45 Steampunk Debutante collection.

Don't forget to check out the blog candy post from earlier in the week if you haven't signed up yet.