Wednesday, July 22, 2015

Wall Hangings for Creative Embellishment


Hi all.  I am up on the Creative Embellishment's blog with some wall hangings that I made for my craftroom.  Every time I pass by my light switch cover in the craft room, it brings a smile to my face.  I used it as inspiration for this project.  The base of this project are probably my some of my most favorite chippie pieces ever.

 
I cut a piece of chipboard to fit inside the steampunk gear frame and then layered on small, medium, and large chippie gears.  The die is so intricate that it wasn't necessary, but I love the definition. I couldn't pass up the opportunity to dig out my loose parts and propellers.  I painted the whole thing in black paint and then sprayed with different colors of Lindy's Stamp Gang.
 
 
I layered on some Marion Smith papers and then stamped with the distressed brick stamp and the distressed script stamp to add to the back ground.  I added embossing powder around the edges.  I painted the inspire word set with black paint and added some patina gilder's paste.  Then I had to include these awesome new dressform chippies.  If you look closely you can see how detailed they are with scrolls.  LOVE.  I sprayed them with the same sprays I used on the frame. 

Tuesday, July 21, 2015

Beach Keepsake Box with Creative Embellishments

Kelley here with a beach keepsake box for creative embellishments.   I love the vintage look of the Graphic 45 collection.  I did have to give it a distressed look though. 
 
I used a wooden cigar box and painted it with blue chalk paint.  Then I dry brushed over it with some gesso to give it a beachy feel.  I used some netting to add to the top of the box over the layers.
 
 
I used tea dye and vintage photo distress stains on the chipboard nautical anchor.  I think it really adds to the beachy feel of the box.

Tuesday, July 7, 2015

Grungy Canvas for Creative Embellishments


Hi all.  I am up on the Creative Embellishments blog today with a grungy canvas.  I used a paper transfer technique for the base of my canvas.  My favorite part was that the corset was a part of the transfer.  With a little stitching, inking, shading and some trim it pops off the page.  Lots of stamping and inking in the background.  I made a mold of the faucet handle and the rusted the resin so the piece is super light. 


I used the large gears as a back drop behind my image.  I just love them. I rusted the gears and then added patina paint to the top.  I used Modern Masters Iron Paint and Rusting Solution for all the rust.  It works great on chipboard. 
For the embellishment cluster atthebottom, Included flowers, molded pieces, fussy cut images, and an awesome chipboard feather.  Oh my these feathers are so detailed, I just love.  I used varying colors of paint and then heat embossed until it bubbled.  I love the texture it gives. 


Supplies Used:
 large gears
feathers

Tuesday, June 30, 2015

Blog candy winner.......

Congrats Beverly Gray.  Thank you all who played along. This was fun.

July Challenge Over at Creative Embellishments

It is that time of month again for another monthly challenge over at CreativeEmbellishments.com/blog.  Come join for your chance at a $50 gift voucher for the store.  They have some amazing products.   I do want to give a quick announcement....Creative Embellishments is having a DT call, so go check them out on the blog or their Facebook page.

CHALLENGE PHOTO: Be inspired by at least one element in the photo and use at least one wooden element.


Here is my take:


I was inspired by the red flowers so I decided to make red and flowers a large part of my tag.  I fussy cut a ton of flowers from G45 French Country and layered.  I just love the hot air balloon chippies and tried my hand at paper piecing over the top to give a different look.  I finished it off by heavily inking between the etched lines and sealing over the top with glossy accents.  For the wooden element, I used part of a leaf at the top of the tag inked green to give a pop of a color to tie with the leaves from the flowers.

Sunday, June 28, 2015

Grungy Butterfly Plaque for Creative Embellishments


Kelley here for Creative Embellishments with a grungy butterfly plaque.  This was a blast to make.  For the base of the plaque, I grunged it up using a wax resist technique on the plaque itself. I covered with TH patterned paper. I spread over it bronze distress paint mixed with molding paste to thicken.  Stamped all over, dry brushed gesso, and smeared on patina paint.


My favorite part of the plaque was making the butterfly.  I started with a steampunk butterfly and combined Modern Masters Rust and Bronze paints to get varying colors.  I layered with gears metals and gems.  I added touches of white and patina paint.   These chippies are amazing, they can handle lots of paints and mediums and still hold up.  I layered gears ender the metal flowers.


Supplies Used:

Steampunk Butterfly
Gears

Wednesday, June 10, 2015

Angel Kiss Pocket


Hi everyone.  I am up today on the Creative Embellishments blog today with an Angel Kiss pocket.  An angel kiss is a little random act of kindness that you surprise someone with to make their day a little brighter.  I decided to make a little have inch pocket to stuff some fun little goodies in.


I used Bo Bunny, Prima, Recollections, and Marion Smith papers.  I love how they all worked together. I used the page corner set 2 on the front of the box.  I found a cute little prima stamp set I wanted to include in the box. So I thought it would be fun to put a clock face on the back to match the sentiment of the stamp set. I used Antique Linen embossing powder with vintage photo distress stain highlights on the clock face.


Supplies Used
clock face
corner page set 2

Sunday, June 7, 2015

Mask for Creative Embellisments


Hello all.  I am up on the Creative Embellishment's Blog today with a steampunk inspired mask.  I cut out sections of a cheap craft store mask and replaced those sections with pieces of the  fishnet panel.  I added just a few of the small gears 2 and medium gears 2 over the panels. 

I layered loads of masking tape, crinkling subtly as I layered.  The set I used was loose parts 2.  I love the steampunk style. I wanted to have extra texture, so I used extra course texture gel over the tape and chippie pieces to create a pitted effect. I added layers of acrylic paint to bring out the texture and colors.
 
Supplies Used:
loose parts 2

Sunday, May 31, 2015

June challenge time at Creative Embellishments

Hi everyone.  I am so excited for this month's challenge over at Creative Embellishments.  I have to say I had a blast doing this one.

Challenge Photo:


Here is my take on the photo:


For this month's challenge, I made a shadow box tag.  They are so much fun to do. For the inside, I layered masking tape, layers of paint, stamping using the distressed script and paint splat trio stamps.  I embossed using a TH texture fade folder, then covered in Prima Art Basics platinum crackle.  I used the steampunk clock for the center focal point.   I added fussy cut images from Steampunk Debutante including the butterflies for the twist.


For the outside.  I used masking tape, gesso, modeling paste, embossing powders and texture sand to get varying textures.  I used steampunk clock hands, loose parts, propellers, steampunk frame, gear set 2 large, gear set 2 medium, and gear set 2 small.


Blog Candy - Yep it is that time for a big giveaway

Hi crafty peeps.  I am having a blog candy give away during the month of June. So this officially starts tomorrow. I am giving away a medium flat rate box chucked full of crafting goodies.  Lots and lots of fun stuff.  Hint: I just picked up a Tim Holtz new words die set and his crazy birds stamp set to add to the things I have been collecting.

Anyone can enter to win.  Yes, my out of country friends can join in on the fun too.  Just follow the rafflecopter link and it will help you enter. So main thing to do to enter is follow my blog.  That gains you one entry into the blog.  Second is to comment on this post of what are you inspired by.

There are two other ways to gain extra entries.  I am such a fan of Creative Embellishments products (big huge fan), that if you like their facebook page - that is another entry.  If you participate in their June challenge which will be up on their blog (creativeembellishment.com/blog) tomorrow, that will gain you another entry.  I love to support small businesses, and they are amazing.  They carry chipboard, stamps, wood veneers, and flair.  I have to say that the steampunk chippies are my most  favorite crafting embellishment right now.  So detailed. Their shop is creativeembellishments.com if you want to check them out.

Stay tuned for July 1st when I pick a winner.


a Rafflecopter giveaway

Monday, May 25, 2015

Pocket Letter Number Two for Creative Embellishments


Hi there folks....I am up on the Creative Embellishment's blog again today with another pocket letter.  These are super fun to make.  This time I grabbed items from my stash, some fabulous CE Chippies, and a CE stamp to make this one.  Of course there is tons of glitter with my few favorite way of the day to add to papers and make chippies come alive.  Tons of fun. 


This CE fairy door is amazing.  It has so many details down to the wood grain, the window, and layered hinge.  I wanted o keep the look of the door, so I added Tea Stain and Vintage Photo distress stains to color then added Wink of Stella clear glitter pen over the whole door to make it shine.  It glitters like a magical fair.  Added some moss to give it the forest fairy feel.  If you look close in the window, there is a teeny tiny fairy smiling back at you.


In the top Middle pocket I added stamping using the grunge music note border stamp in coffee archival ink.  I also used a frond that I used Mowed Lawn distress stain and more Wink of Stella on to create a climbing structures for play for the tiny fairies.
 
Just a reminder to come and join us for some for some fun on the CE Blog for the monthly challenges.  A winner is chosen randomly each month for a $50 gift voucher for the store.  You can make anything as long as your are inspired by the challenge photo, try the twist, and use at least one CE product.  Easy peasy.   


Supplies Used:

Tuesday, May 12, 2015

Pocket Letter with Creative Embellishments

 
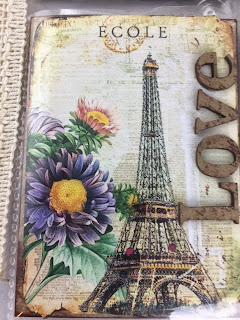
Hi all.  I am up on the Creative Embellishments blog today with a Pocket Letter.  I have to say I was a little late to jump on the bandwagon.  I was asked to fill in a spot on a swap so thought it was a good time to try.  It was actually a lot of fun to do.There are 9 atcs in a Paris theme.  I stuffed little goodies into the back of each pocket for my partner.   I used digital prints, and pieces of G45 and Prima papers, inks, lots of bits, flowers, bling, and of course my favorite CE stamping and chippies. I finished off with some lace and chippies.
 
 On the top left pocket, I made a pocket envelope to let my partner know a little about me.  I added stamping with the distress script stamp to give it more texture as well as on the bottom left on top of the raw chipboard letters, and on the middle far right pocket.  On that same chippie I used a piece of the door knocker.  On the middle top pocket I used a piece of the brick lattice.  These were so much fun, I think I will try another.


Supplies Used:
http://creativeembellishments.com/rubber-stamps/distressed-script-stamp.html
http://creativeembellishments.com/chipboard/alphabets/basic-alphabet.html
http://creativeembellishments.com/chipboard/6-x-6-lattice-panels/mini-brick-panel.html
http://creativeembellishments.com/door-knockers.html?search=door knocker

Thursday, April 30, 2015

May Challenge With Creative Embellishments

Woot Woot it is time again for another Monthly Challenge with Creative Embellishments.  How exciting is that.


For my take this month, I made a mother's day gift set for my mom.  I took from the challenge photo the flowers.  I thought the roses in the paper were beautiful. I used the Botanical Tea Collection from Graphic 45 and cut it using a Silhouette cut file.  The twist this month was to use some form of crackle.  I used a little platinum crackle on the Flourish Corner and then used a Verdigris ink pad to stamp with the Distress Crackle Stamp on it.  How cute would this look in baby papers with the baby themed wood veneers from the shop?  I think it would make an awesome shower present.
 
Come check out the challenge and play with us.  They give out a generous monthly prize as well.
 

Wednesday, April 22, 2015

Metal Love with Creative Embellishments


I am up today on the Creative Embellishments blog with an altered Tim Holtz configuration book box.  I wanted to make the box as a gift to store metal goodies. Yum.  On the outside I wanted to give the appearance of metal but ended up using mostly chippie goodness. 


I started off the box layering medical tape and covering with gesso and using a Tim Holtz diamond stencil with modeling paste for texture.  I stamped into the wet paste for texture.  I used the steampunk gear frame as the main piece for the top of the box.  I layered with an assortment of gears, loose parts, and propellers.  These pieces work really well together and you get so many pieces in the package that I can usually stretch it for several projects.  I painted with different shades of grey by varying amounts of a black and white acrylic mixture.  I highlighted parts of the box with silver rub and buff and patina Guilder's paste.  I finished off with some metal bits.


In the center of the frame I added drywall mesh, punchinella. modeling paste, a metal heart, and chipboard letters.  I covered them all with torn pieces of metal that I burnished down and added over alcohol inks.  I went over the letters with silver rub-n-buff to make them stand out.


For the inside of the box, I used Marion Smith's Nirvana collection.  I kept it pretty simple as I wanted it to be practical.  I finished the edges of the inner boxes with black washi tape brushed with a little of the silver rub-n-buff.


supplies used:


http://creativeembellishments.com/chipboard/steampunk?page=3
http://creativeembellishments.com/chipboard/steampunk/gear-set-2-medium.html
http://creativeembellishments.com/chipboard/steampunk/loose-parts.html
http://creativeembellishments.com/chipboard/steampunk/prope
http://creativeembellishments.com/chipboard/alphabets/basic-alphabet.htmlllers.html

Monday, April 20, 2015

Steampunk Dressforms for Creative Embellishments


Hi All.  I am up on the Creative Embellishments blog today with Steampunk Dressforms.  These were so fun to make.  I am going to incorporate them into a larger project so the stand that are sitting on for now is just so that you can see how the skirts hang. I used paper mache dress forms from the Michael's bins that I have had in my stash for a while waiting to be loved.  For the dress forms I added lots of acrylic paints, texture mediums, Gilder's paste, and drywall mesh.  To create designs on the dressforms such as the shape of the corset and all the piping, I used small border stickers.  I added trims, lace, metal and chain to finish them off.


However, the most important embellishment on them all that makes them stand out are the wings.  I cannot believe how fabulously detailed these wings are.  What I am most impressed with is that they withstood 7 layers of product and kept their shape and didn't fall apart or get soggy.  I used the fairy wings and the Wing Set 2.

You don't think I would actually do a dressform and forget a gear?  I had to include a few small gears.


Supplies Used:


Gear Set 2 Small


Fairy Wing Set 3


Wing Set 2

Tuesday, March 31, 2015

April Challenge over at Creative Embellishments


Challenge time over on the Creative Embellishments blog.  Spring is definitely in the air.  You should check out the amazing projects by the design team.  Come play with us and show us your creation.

Spring has sprung in our household.  I made this to sit on my mantle.  I pulled out my Once Upon a Springtime collection from Graphic 45 and fussy cut images.  I added papers from the collection to the blocks I painted white.  I love the 6 x 6 chipboard panels.  I painted the quarterfoil one white and cut it up to unify all the pieces.  I have a spring floral swag that will be draped over the top when it the blocks become my spring centerpiece.


Sunday, March 22, 2015

Trash to Treasure for Unruly PaperArts

Hi all.  Our sponsor over at Unruly PaperArts is the wonderful Rubber Dance Art Stamps. Check out her awesome selection at RubberDance.com.  Our theme for March is Trash to Treasure.  Head on over to UnrulyPaperArts.com to check out my full article and tutorial.  I love how my project came out.

Here is a sneak peek:


Monday, March 9, 2015

Sewing Box for Creative Embellishments


Today's project is a sewing box for Creative Embellishments.  I have had this box in my craft room for several years.  It was falling apart and all the sewing items were just thrown in there.  It was time to either throw it out or give it new life.  I started with repair work by reinforcing all the seams of the box. I painted all the edges with black gesso and TH black soot crackle paint. I used Marion Smith papers to cover both the inside and outside of the box.


The sewing machine set is divine.  The picture doesn't pick up all the detail, but there is engraving details that really pop when painted.  I have painted the chippies black, added touches of silver Rub-N-Buff.  I accented a few of the pieces with the distress script stamp embossed with snow white embossing powder.  I made a flower from TH fabric, sprayed with Heidi Swapp black Color Shine spray, topped with a chipboard button from the set and added lace as leaves.


For the top of the box, I made a pocket to hold the manual for the sewing machine.  I added trims, a dress form from the set, and a chipboard flourish.


For the bottom of the box, I organized my supplies into empty Heidi Swap Color Shine boxes.  I love when you can reuse items you would normally throw away.  I created belly bands and layered labels.  I topped each with the coordinating chippie of what was inside the box.


Supplies Used:

Sewing Machine Set

Distressed Script Stamp

Flourish 17