
Sunday, March 4, 2012
post 265

post 264
Glass, coffee, fabric, lights - good smells. All hints I gave my partner...what could it be?


post 263
Real quick post....I will be back with pictures. I worked on a project for Kim and the project smells fabulous. Yes I said smell. I am used to get ink, glue, glitter and such on my hands but nothing that smells absolutely awesome. Yay. I am a little short on a component so I need to run out and get a little more...it is worth it. I really like this. :)
Saturday, March 3, 2012
262
Insert sad face here. Oh man. I wish I had modge podged the tray first then added the resin. It discolored parts of the paper - not too bad though. I will make up my mind one it has had a chance to sit a while and cure. I hope the discoloration goes away.


post 261

post 260
Looks like I have a whole week of posts to catch up. I have had a rough week, but today will be productive. I am working on two items that are drying before I work on the next step, so I decided that I would make something for the Easter/Spring Swap.
I had seen some butterfly embellishments and thought they were really cute. I wanted to make some using what I had in my stash so I checked out YouTube. I love YouTube it is an awesome resource. I found a tutorial I liked, but I made a few changes. In the tutorial she had used some large mesh rosette trim that was already colored. I had found in my stash some shabby chic white trim from Tim Holtz - yay! (My trim is much smaller than what she used - but it worked). I glimmer misted them and let dry. Then I assembled like she had in the tutorial onto the circle. On the trim, for the antennae, I used much less than she showed. I started mid body and went up leaving enough for the antennae, whereas she had gone the full length of the body and had some as a tail. The other change I made was that she used I AmRoses for the length of the body. Although they are beautiful, I just didn't have any in my stash. What I had that was small enough was the ribbon rosettes that you can buy at Joann's or Walmart for .97 for 40. I cut off the green ribbon leaves and placed a dollop of glue to keep them held together. Then I just placed three of them along the length of the body.
I decided to package them into a tin. For smaller items I am really liking the thought of using presentations. So they don't get lost in the box or just looking lonely in a baggie. I had a tin I found for cheap at the Salvation Army - it was grimy but not scratched. So I cleaned the sucker up and and used some spring/easter colored paper and lined bottom of the tin, the inside top, and then the top of the tin. I added some pink bling and some flowers. I did not have any pink flowers so I used a couple of white ones and then just inked the edges in pink to tie them in.
I'll be back with some more projects today hopefully.


I had seen some butterfly embellishments and thought they were really cute. I wanted to make some using what I had in my stash so I checked out YouTube. I love YouTube it is an awesome resource. I found a tutorial I liked, but I made a few changes. In the tutorial she had used some large mesh rosette trim that was already colored. I had found in my stash some shabby chic white trim from Tim Holtz - yay! (My trim is much smaller than what she used - but it worked). I glimmer misted them and let dry. Then I assembled like she had in the tutorial onto the circle. On the trim, for the antennae, I used much less than she showed. I started mid body and went up leaving enough for the antennae, whereas she had gone the full length of the body and had some as a tail. The other change I made was that she used I AmRoses for the length of the body. Although they are beautiful, I just didn't have any in my stash. What I had that was small enough was the ribbon rosettes that you can buy at Joann's or Walmart for .97 for 40. I cut off the green ribbon leaves and placed a dollop of glue to keep them held together. Then I just placed three of them along the length of the body.
I decided to package them into a tin. For smaller items I am really liking the thought of using presentations. So they don't get lost in the box or just looking lonely in a baggie. I had a tin I found for cheap at the Salvation Army - it was grimy but not scratched. So I cleaned the sucker up and and used some spring/easter colored paper and lined bottom of the tin, the inside top, and then the top of the tin. I added some pink bling and some flowers. I did not have any pink flowers so I used a couple of white ones and then just inked the edges in pink to tie them in.
I'll be back with some more projects today hopefully.


Sunday, February 26, 2012
Post 258 and 259
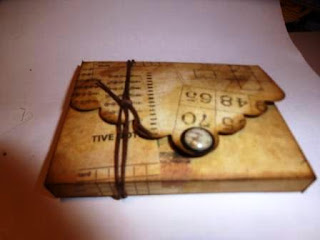
I really liked how that frame came out, so I decided to make another one. For this frame I didn't rub the distress ink onto it so it came out a little lighter. I kind of like it. They are so close, so it is hard to tell though. Then I also made this weekend some altered dominoes and some mini note cards. I am not much of a card maker any more so it was a wee bit of a struggle to come up with a style that I thought would work. I think they came out okay though. I am working on some larger projects that will take some time for another swap, so I will show pictures as those get done. For now here are some pics of what I did complete. Now seeing the pictures, looks like I might go back and add a little more embellishment to the presentations.


Subscribe to:
Posts (Atom)